
Automations - Create & Editor
Package: BASIC
1. Creating an automation
Without any existing automation, the "Automations" area appears as follows:
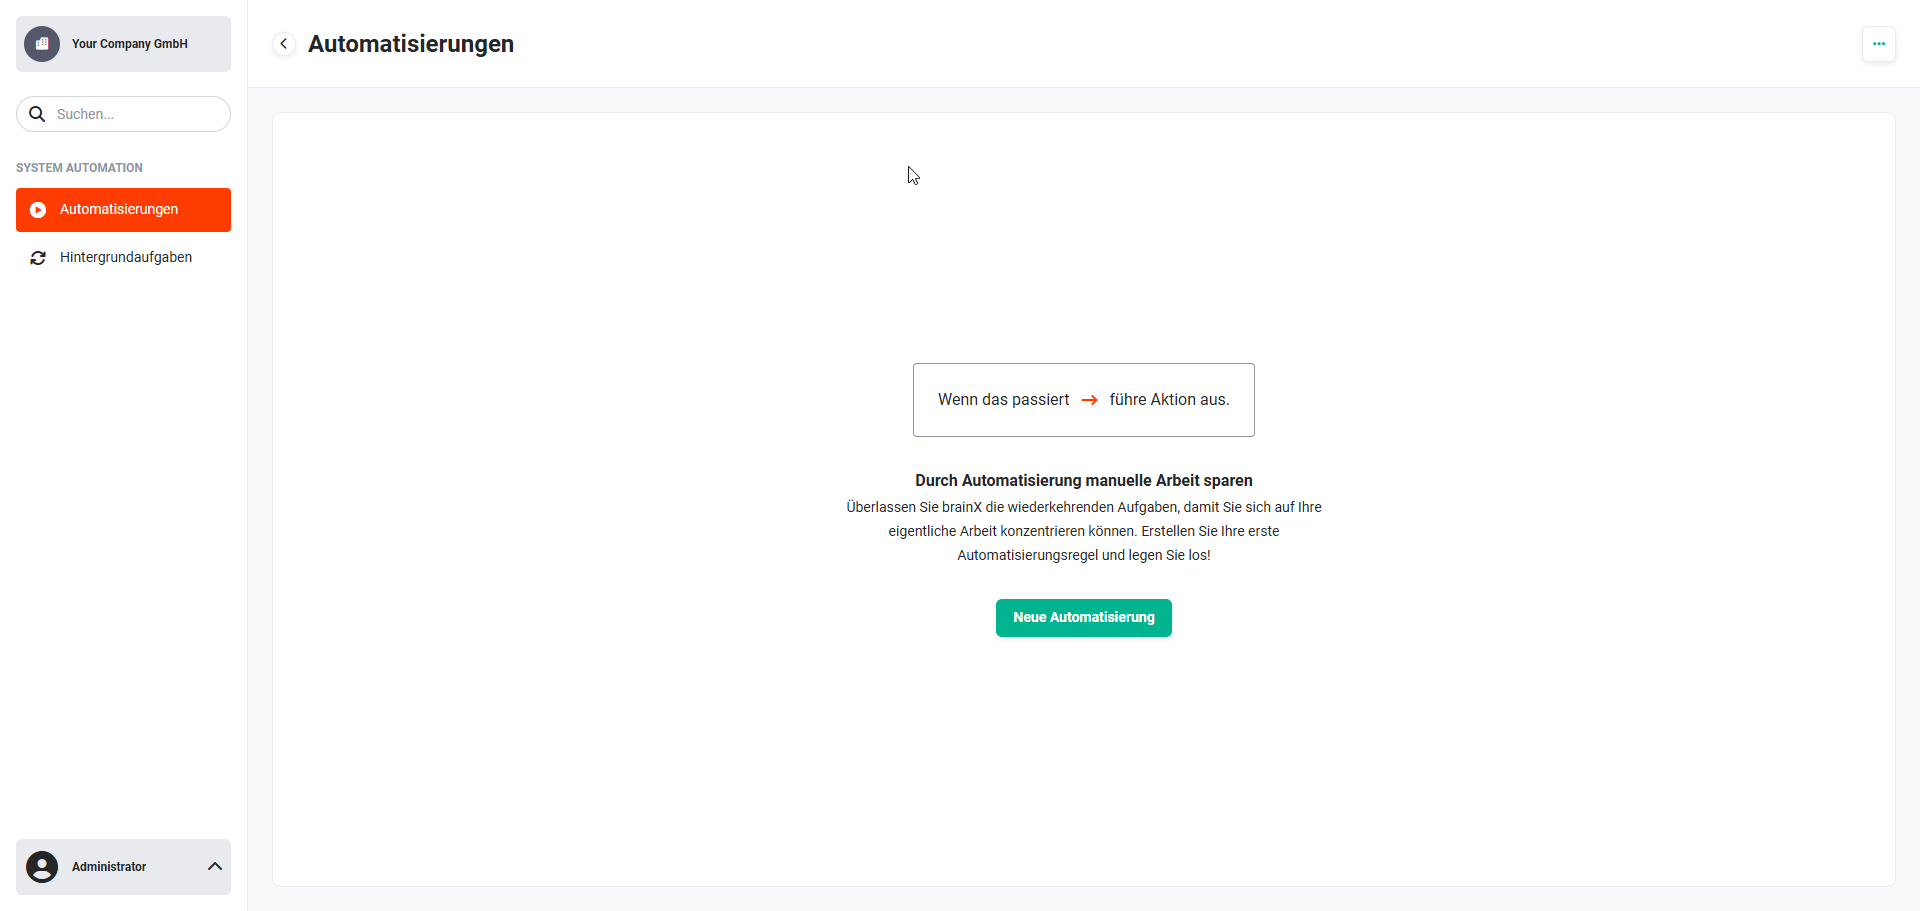 Automations view without an existing automation
To create a new automation, click the "Create automation" button. The "New automation" popup opens.
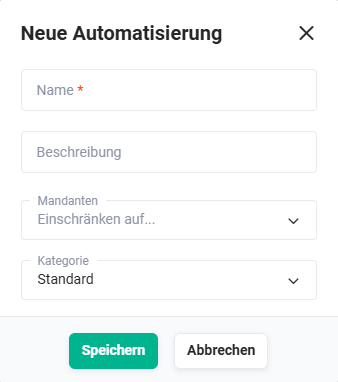 "New automation" popup
The following fields are available in the "New automation" popup:
- Name → Name of the automation
- Description → Short description of the automation
- Organizations → Restricts the automation to specific Organizations. If no organization is selected, the automation applies to all organizations.
- Category → Category of the automation
After clicking the "Save" button in the "New automation" popup, the editor for creating the automation is displayed.
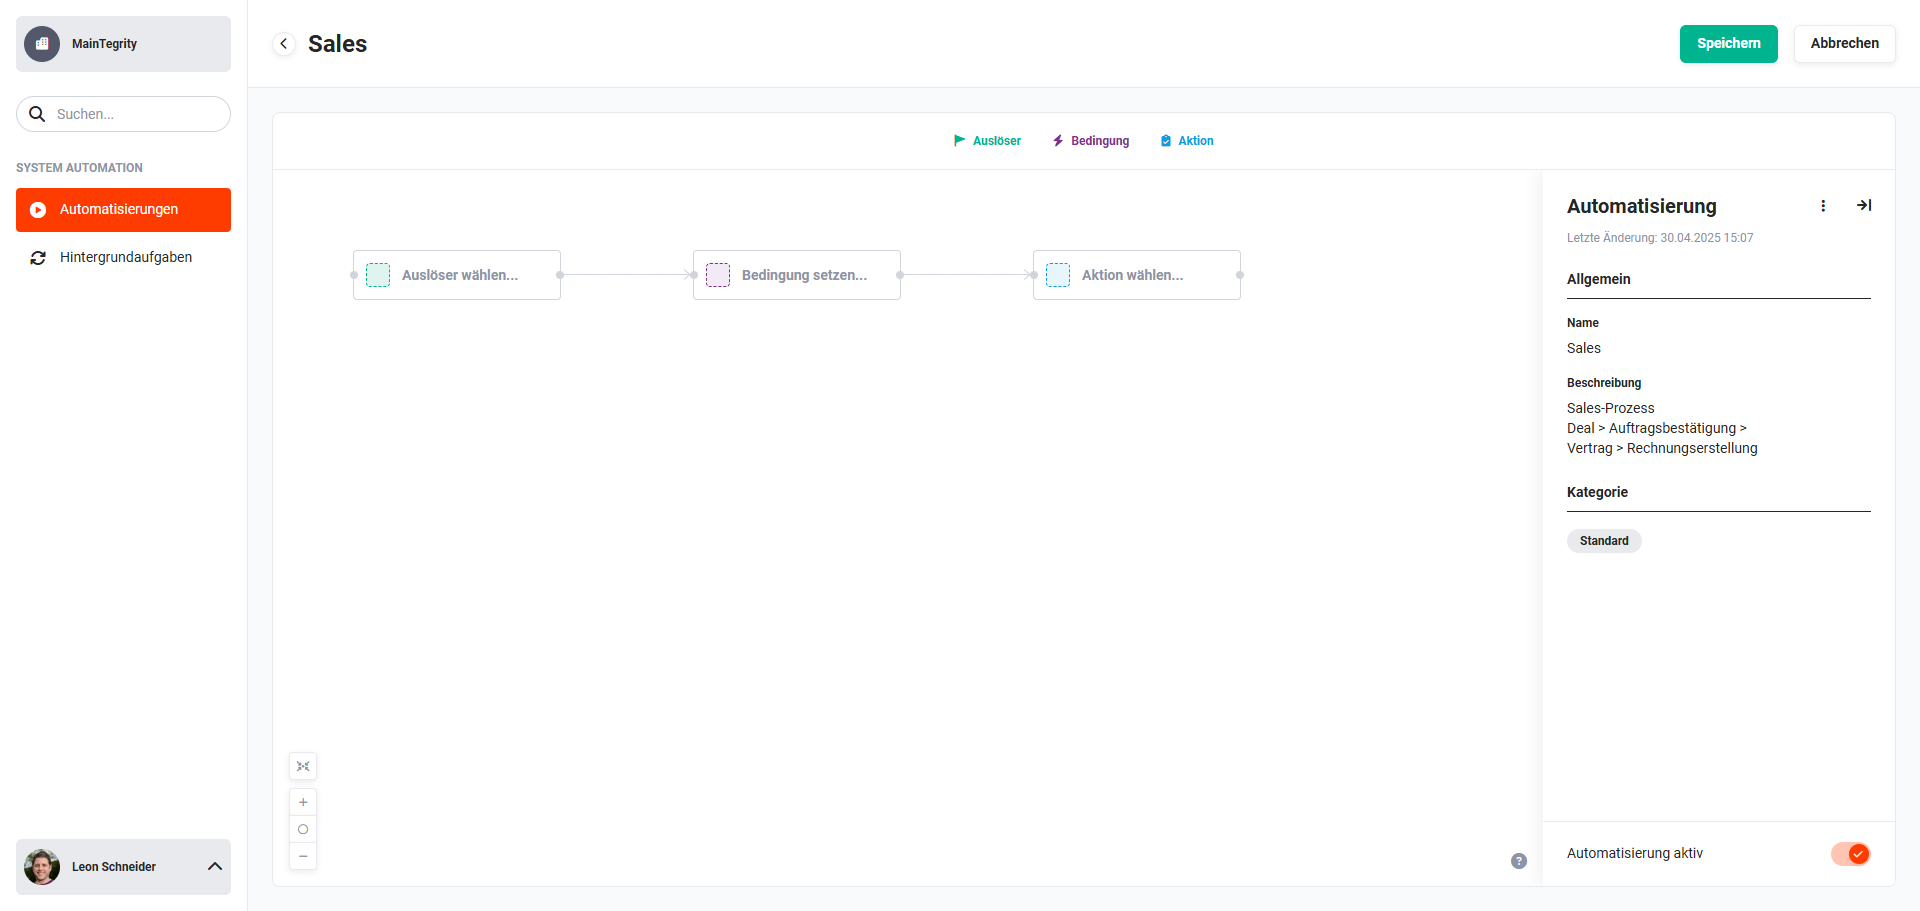 Automation editor view
Newly created automations are initially inactive and must generally be activated explicitly using the "Automation active" toggle.
All further steps for creating an automation, in particular the configuration of
are described in detail on the linked pages and in the following sections.
2. Editor functionalities
The following screenshot and short description serve as a basic explanation of the general functionalities in the editor.
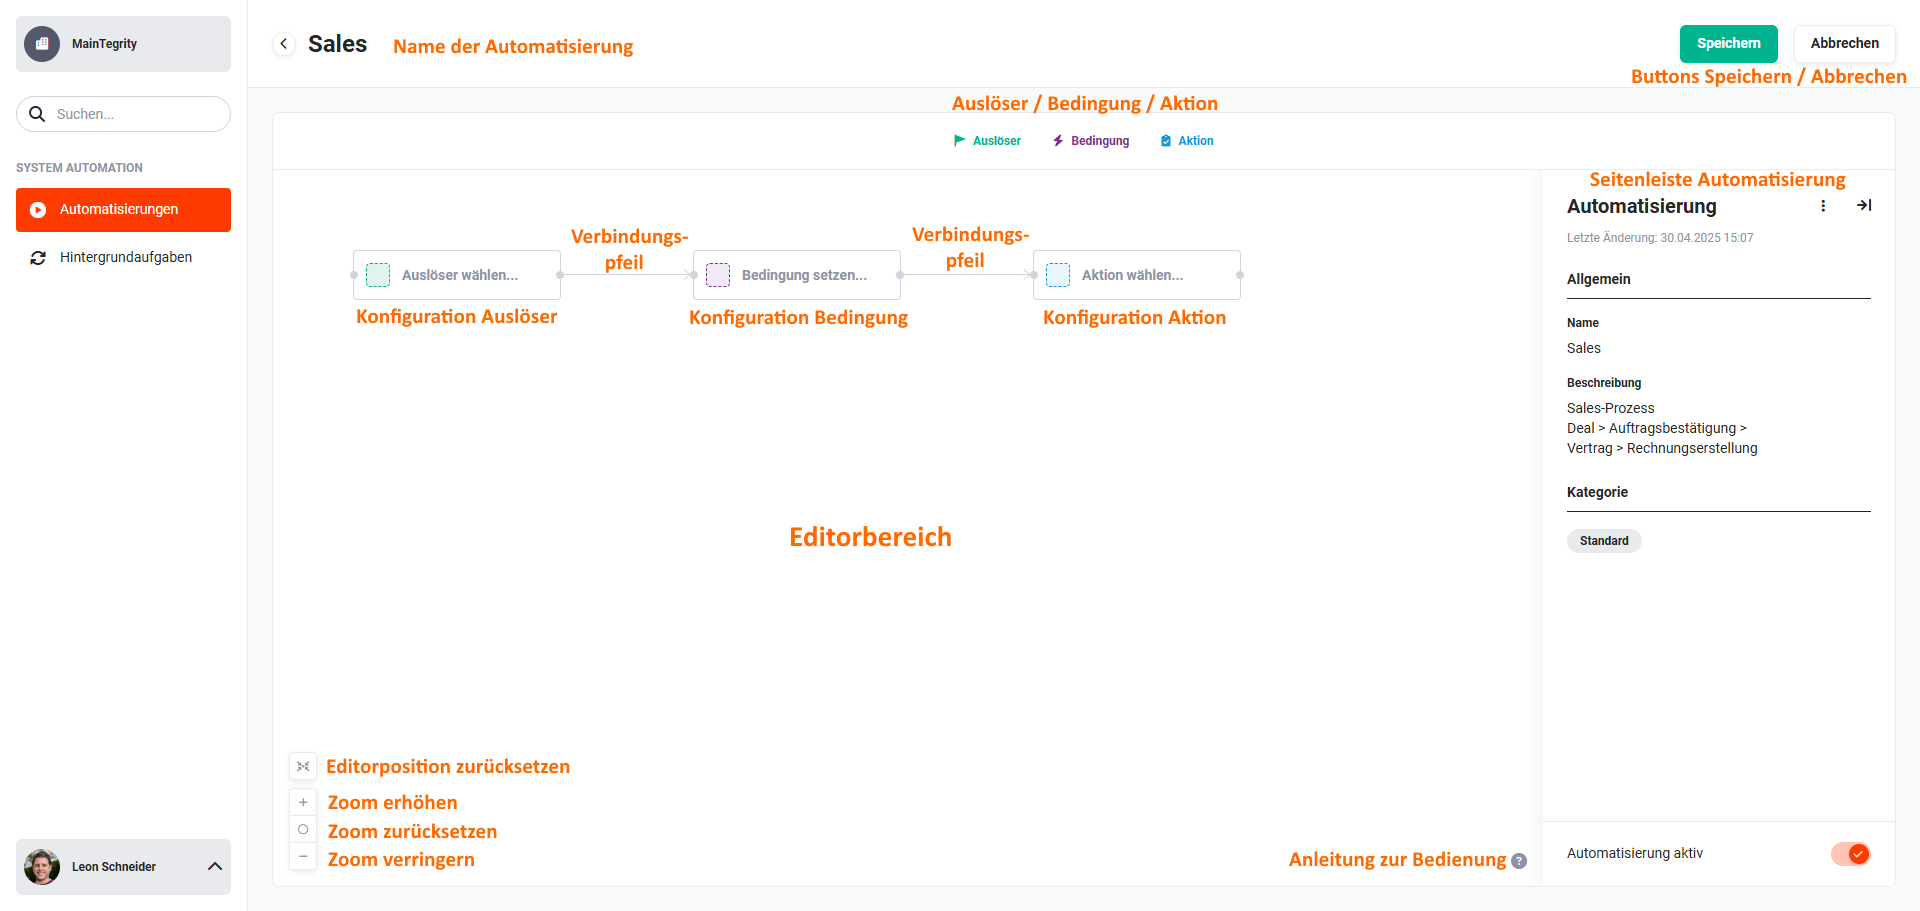 Automation – Functionalities in the editor
2.1. Overview of the functionalities
- Name of the automation → Displays the name of the automation
- Save/Cancel buttons
- Save button → save settings/changes
- Cancel button → cancel editing; the list view of the automations is displayed
- Trigger/Condition/Action → insert Triggers, Conditions and Actions into the editor area via Drag & Drop
Info: Triggers, conditions and actions are also generally referred to as "nodes" in the following descriptions. - Automation sidebar → general information about the automation
- Editor area
2.2. Automation sidebar
The automation sidebar displays details of the displayed automation:
- General
- Name → Name of the automation
- Description → Short description of the automation
- Category
- Category → Category of the automation
In the automation sidebar there are two action icons at the top right as well as a toggle at the bottom:
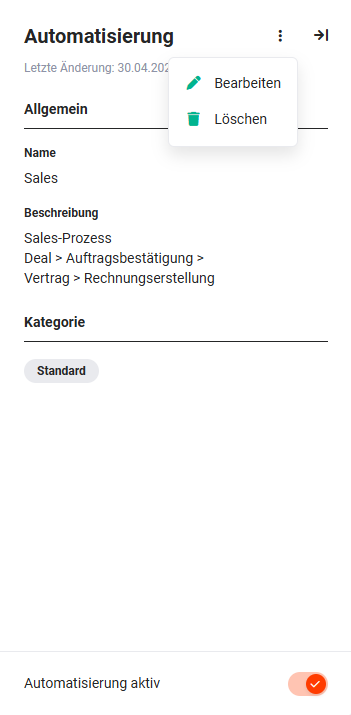 Automation sidebar
- Show actions ("three dots" icon) → after clicking, a flyout menu with the following actions is displayed:
- Edit → After clicking the "Edit" action, the "Edit" popup opens, in which the name, description and category can be changed.
- Delete → After clicking the "Delete" action, a prompt opens ("Do you really want to delete the automation? This operation cannot be undone."), asking whether the automation should really be deleted. After clicking the "Confirm" button, the automation is deleted.
- Show/hide sidebar → the sidebar can be shown/hidden by clicking the "arrow with vertical line" action icon
- Automation active/inactive toggle → the toggle can be used to set the automation to active/inactive
2.3. Editor area
An automation is configured in detail in the editor area. The most important components here are triggers, conditions and actions, which are connected to one another.
The configuration of these components ultimately controls the entire flow of an automation.
When creating a new automation, one trigger, one condition and one action are present in the editor, although these are not yet configured.
Additional/further triggers, conditions and actions can be added via Drag & Drop. To do this, simply drag the action icon of a node (trigger, condition or action) from the upper area into the editor area.
The individual nodes can then be configured, positioned and connected in the editor.
After saving, each tile of a trigger, a condition and an action is given a system-side numbering, which is displayed at the bottom right of the tile.
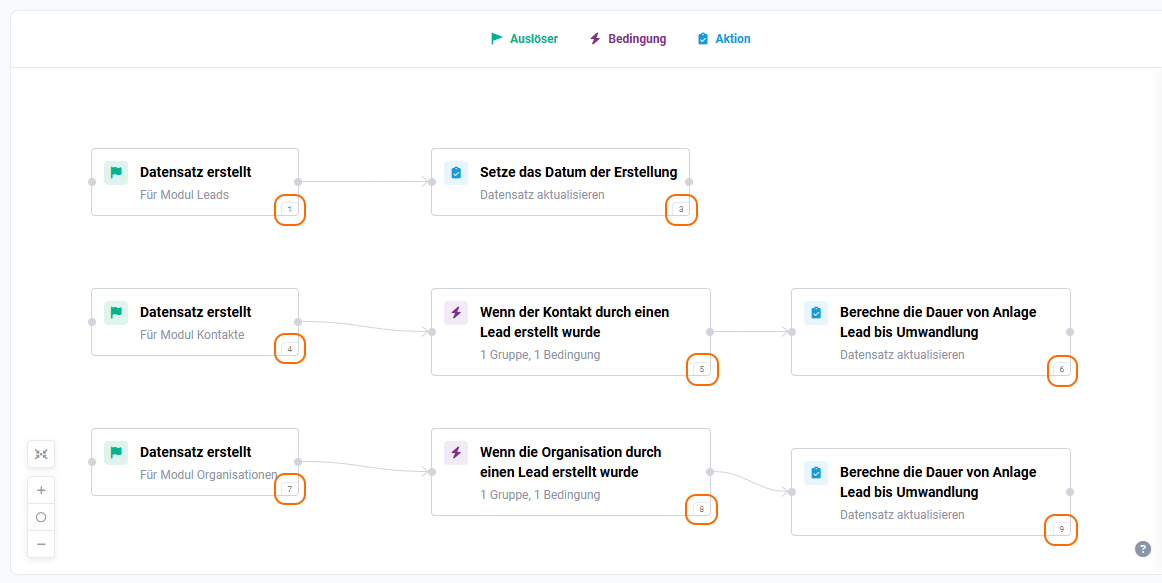 Example – Numbering of the tiles
The numbering is assigned in the order of creation and serves for the unique identification as well as for orientation for administrative users when creating, editing and managing automations.
The numbering of the tiles has no influence on the order in which triggers, conditions and actions are processed!
2.3.1. Trigger configuration
The trigger defines when a specific part of the automation should be started. The detailed description of the configuration of triggers, including all available events and setting options, can be found on the subpage Automations – Triggers.
2.3.2. Condition configuration
Conditions define whether actions should only be executed under certain requirements. The detailed description of the configuration of conditions, including comparison operators, condition groups and the abort condition, can be found on the subpage Automations – Conditions.
2.3.3. Action configuration
Actions determine what should happen when an event occurs and any requirements are met. The detailed description of all available actions and their configuration can be found on the subpage Automations – Actions.
When editing an action in the editor, the following processes apply:
- Inserting a successor node: The menu for inserting a successor node opens directly after clicking the corresponding element – without an additional intermediate step.
- Selecting a new action: After selecting a new action, the configuration mask is opened immediately. A separate Next button is no longer required. The selection can be changed at any time via Back.
2.3.4. Connection arrow
Connection arrows are used to connect the triggers, conditions and actions.
In the rectangular graphical representation of triggers, conditions and actions there are "connection points" ("grey dots") on the left and right. By "holding the left mouse button + dragging" a connection point, it can be connected to another connection point.
The process is as follows: "hold" the connection point (left mouse button pressed) → drag to the next connection point with the left mouse button pressed → release the mouse button.
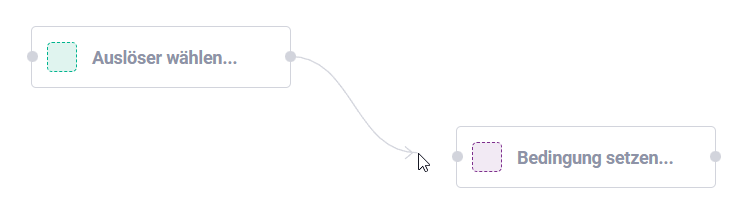 Adding a connection arrow
A connection arrow can be deleted again by clicking on it (the arrow is highlighted red) and pressing the "Del key".
If connection arrows are deleted, new connections should be created first, as otherwise all subsequent nodes will be reset!
To avoid accidental deletion, the following note is displayed before a connection arrow is deleted: "Do you really want to delete this connection? Subsequent nodes may thereby be reset if they lose the module binding of a trigger.".
Only after clicking the "Confirm" button is the connection arrow deleted.
2.3.5. Reset editor position
The displayed editor area can be moved in any desired direction by "holding the left mouse button + dragging". The current selection of nodes is retained in the process.
After clicking the "Reset editor position" action icon ("four arrows with dot" icon), the position of all elements in the editor is reset to the default position.
2.3.6. Increase zoom
Clicking the "Increase zoom" action icon ("Plus" icon) enlarges the view.
2.3.7. Reset zoom
Clicking the "Reset zoom" action icon ("Circle" icon) resets the view to the default setting.
2.3.8. Decrease zoom
Clicking the "Decrease zoom" action icon ("Minus" icon) reduces the view.
2.3.9. Operating instructions
After clicking the "Operating instructions" action icon ("Question mark" icon), a popup with brief operating instructions is displayed.
Node actions
A node can be selected with a single click. Details are then displayed and you can delete it with the "Del" key. A double click can be used to open the editing of the node's settings directly.
Multiple move
You can select several nodes and move them together by holding down the "Shift" key.
Delete connection
You can select a connection by clicking and delete it via the "Del" key.
Keyboard operation
Once a node has been selected with the "Tab" key, it can be moved with the arrow keys, the "Space bar" activates it and "Enter" opens the editing.
2.3.10. Numbering of the elements
After being inserted or configured, each element (trigger/condition/action) is assigned a number by the system. The numbering serves for better identification of the individual elements.
The numbers are displayed at the bottom right of the elements.
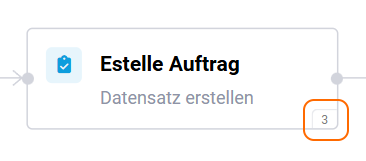 Numbering of elements
The numbering is assigned in the order of creation, regardless of whether it is a trigger, a condition or an action.
If elements that have subsequent elements are deleted, the numbers are no longer reassigned when further elements are created. For this reason, it can happen that numbers are "missing", which is merely an indication that the automation has been edited.
2.3.11. Highlighting the nodes
All nodes and connections associated with a selected node – both preceding and subsequent – can be highlighted.
The highlighting is activated via a toggle at the bottom of the editor and remains saved.
If several nodes are selected at the same time, all predecessor and successor nodes connected to the selection are highlighted.
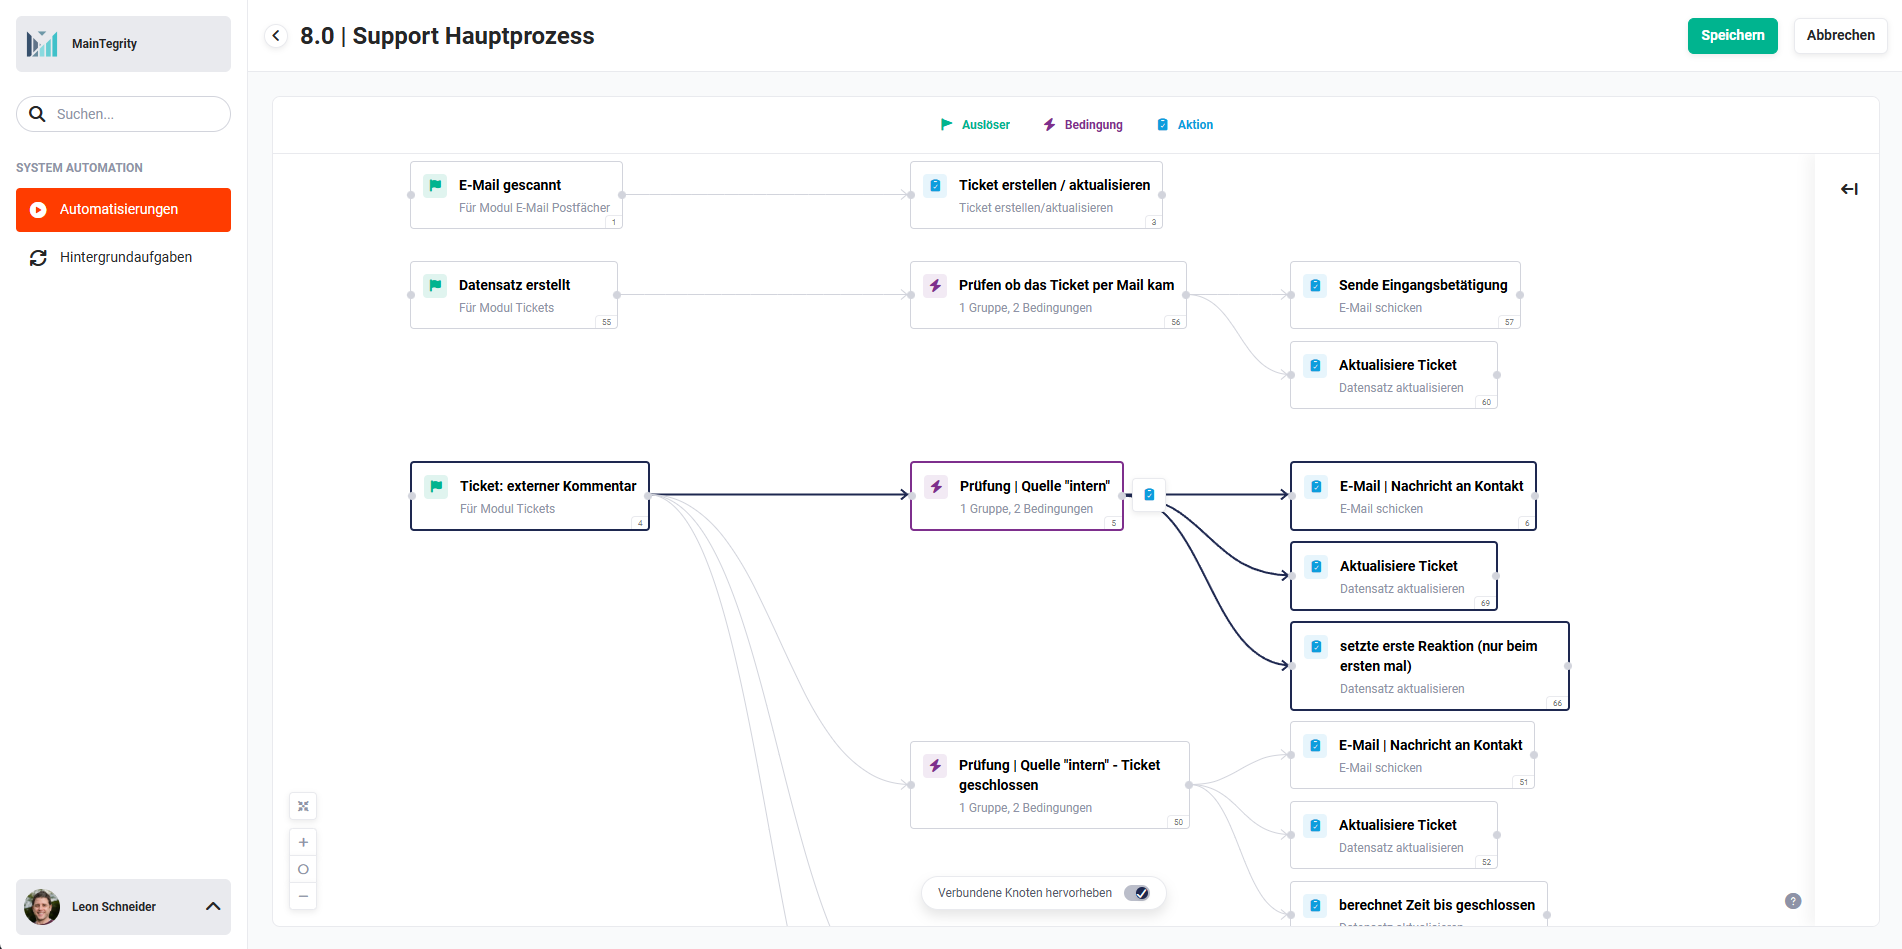 Highlight connected nodes
2.3.12. Context menu
A context menu is available for all components of the editor (Triggers, Conditions and Actions) that offers the following functions:
- Align nodes → Several nodes can be selected while holding down the Shift key and aligned horizontally or vertically to one another.
- Mark subsequent nodes → A right-click on a single node marks this node as well as all nodes following it.
- Extract branch → A complete branch of an existing automation can be extracted via the context menu – either as a new automation or as an addition to an already existing one. The original branch can remain unchanged, be deactivated or be deleted.